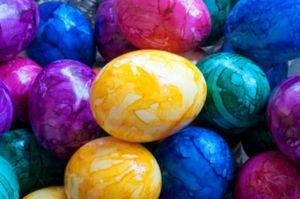
To quote The Beatles: “I long for yesterday.”
Back then you didn’t have to have a degree in mixology and interior design to decorate Easter eggs. All you needed were a few bowls, some hard-boiled eggs, a handful of dissolving dye tablets and a wire dunker.
Every year it was PAAS or bust.
Parents of my generation know that PAAS is the Kleenex of Easter egg decorating kits.
So, why mess with success?
Today, moms and dads are bombarded with crazy egg decorating sets that require mad scientist skills to jazz-up hard-boiled ovum in time for Easter.
Long gone are the rudimentary wire dunkers. These days parents need to know how to manipulate containers containing complex pigments for special effects, in addition to the myriad of squeeze pouches with brushes, rollers and sponges for “easy” application.
The litany of specialized gear will supposedly allow your kid the chance to create sparkly, splattered, pearlescent, marbleized, tattooed, shrink-wrapped, beaded, stenciled, neon, sand-blasted, sequined, stickered, stamped, striped, camouflaged, or candy apple shiny Easter eggs.
Oh, and did I mention glitter?
Yes, there is nothing quite like adding devil’s dust to heavenly white eggs.
The only problem is that you practically need an Easter miracle to make it through the glitterizing process with a young kid.
I can attest to that.
A few hours ago my 7-year-old and I attempted to add some sparkle to our holiday ovum by decorating them with the R.J. Rabbit Glitter Egg Kit.
Little did I know that I was going to have to channel my inner NASA engineer to comprehend the nearly incomprehensible directions.
For starters, the kit requires your eggs to be warm, not cold.
In fact, if you could have the chicken lay it fresh for you, the folks at R.J. would probably have you do so.
In other words, if you planned to boil your eggs the night before or a few hours prior to decorating, then you’re already well on your way to failure.
Next, the eggs need to be cooked in a non-aluminum pot.
To understand why, you’d need to consult your NASA guide book.
Once you’ve gathered your aluminum-free, warm eggs, the next step is to dunk them in the dye for five full minutes. Meaning that all of the eggs that don’t make it into the colored bath in the first round have to be reheated.
If you successfully get the eggs to take on the color, which specifically calls for you to add vinegar to the blue, green and yellow tablets, but not the red and purple, then you can proceed to step 7: glitterization.
To properly add bling to your eggs you need to dip the ovum into a special adhesive that you mix with “very hot tap water.” Next, you place the egg in a flimsy shaker that you don’t want your preschooler (or 7-year-old) to help you make from two dinky pieces of construction paper thin cardboard contained in the kit. According to the directions, the process works best if you use the yellow glitter first, then orange, then pink, then green, then blue, then purple.
If actually followed the directions as printed on the box, you’d need until Christmas to decorate two-dozen eggs.
Then again, my daughter and I wouldn’t really know because instead of our kit containing:
*1 POUCH OF STICKEM, NET WT .07 OZ (2g)
*1 POUCH OF GLITTER, NET WT .17 OZ (5g)
*6 COLORING TABLETS, NET WT .1 OZ (2.8g) 1 EGG DIPPER
*3 EGG STANDS, 1 GLITTER SHAKER, 1 GLITTER SHAKER BAG
We got TWO pouches of Stickem and ZERO bags of glitter.
That’s right; a goose egg of glitter.
And a crying kid.
Thanks a lot, R. J. Rabbit!
Related Articles:
A Wish List for the Easter Bunny
Taking Pictures with the Easter Bunny

