Are you always looking for a chip clip, a jumbo paper clip, or another magnet to secure something to the fridge? If so, you’ll like these ideas. They are quick and easy and your kids will have a good time decorating and personalizing clips for every need.
 Items You will Need:
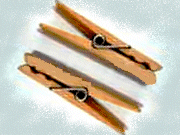
- Wooden clothespins (spring loaded “clip” style)
- Craft paint
- Paintbrush
- Glue
- Beads or other accessories
- Stencils
- Permanent marker
- Magnets
Instructions:
Cover your work surface with newspaper, wax paper, or plastic grocery bags (wax paper is really good when using glue).
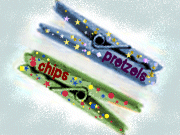
 Lay out the clothespins and begin painting them. You can make them all one color or all different colors. Maybe you’ll want to make a separate color for each function, for example, blue clips for notes, yellow clips for artwork, red for papers with good grades, purple for the lunch calendar, and green for chips or orange for other snacks. In addition, you could make clips for different members of the family in each of their favorite colors.
After the paint dries, label each clip. You can stencil on letters and paint them in or simply write labels with permanent marker.
Next is the fun part. Now it’s time decorate. Glue on some glitter, beads, or add some stickers. You can use anything you like to give your clips a unique look. Girls can add lace or trim down the long edges.
If you are going to use your clips to hang stuff from the fridge, glue a magnet or two onto the backside. Make sure it’s completely dry before you try to use it.
These clips can also be glued to a piece of craft wood and used in kids rooms to hang up artwork. Paint the wood a nice bright color. Space the clips evenly down the length of the board (make sure the glue is dry before use). Add picture frame hangers to the back, hang it up, and start displaying artwork!

