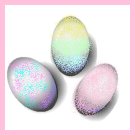
Buying egg-coloring kits is fine and there are some really cute ones available that include stickers and egg holders or involve a theme, but there are also homemade methods for coloring Easter eggs. Various methods will be detailed here from now until Easter, so check back often and print some out!
Here’s one you can try. It can be a little messy, but it’s a lot of fun and it makes beautiful eggs. Just spread out trash bags or wax paper to protect surfaces before beginning.
Sponge Painted Easter Eggs
Boil eggs as you normally would. Allow them to cool thoroughly then dry them. If there is condensation from being in the fridge, let them sit on a clean towel or paper towels. Flip them over at least once and let them sit a few more minutes before beginning.
Items Needed
- Hard boiled Eggs
- Sponge(s)
- String
- Clean margarine tubs
- Paper plate(s)
- Paper cup (or paint pots)
- Newspaper
- Craft paints (the kind that dry quickly and clean up with water)

1. Place one egg into a margarine tub (or you can set them on a paper plate).
2. Cut a clean sponge into pieces.
3. Tie the string around the center of a small piece of sponge, making a large knot on top so children have something to hold onto.
4. Pour a small amount of each color of paint onto a paper plate leaving plenty of space between colors.
5. Use more than one plate if using several colors. You may want to make up one paper plate paint “palette” for each child.
6. Gently dip the sponge into your favorite color paint.
7. Dab it on the newspaper to get rid of excess paint.
8. Gently dab it all over the egg or only in the areas that you want to be that particular color.
9. It’s best to let one color dry before adding another color to keep paint sponges from absorbing other colors.

