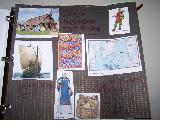
 This is our latest pet project and I must say that it has worked substantially better for me than has lapbooking. One reason is that everything goes into a binder. At our house, this makes it much easier to store and less inviting for the twin demolition team. Another reason is that the project is not dependent on a bunch of little books–which I find difficult to store without someone getting into them before the project is over. Since it’s a binder, we actually plan to add at least one page per time period, or people group that we study, but of course if something catches my daughter’s eye, we will spend more time on it and inevitably create more scrapbook pages for it. Personally, I’m thrilled that my daughter took this project up with gusto because when we’re finished with the year, she will have filled an entire notebook tracing history from the Vikings all the way to World War II–what a phenomenal keepsake that will make. (Had I thought of this last year–she’d have a notebook tracing history through Ancient history all the way through.)
I also have to say. . .this is simply one way to do it. It’s not the only way and I would encourage you to use our example as a jumping off point for your own creativity. If you’ve never tried notebooking, hopefully watching our process will give you some inspiration. I have joked before that I hate scrapbooking. My daughter however, loves to scrapbook and so this was a great way to get her to think through the most important information of the unit and lay it all out.
Materials
A binder–while some might go for the super thick mega binder, I would have a hard time finding a place to store that in my space. So I picked up a package of 2′ binders at Costco.
Scrapbooking papers–Everything I pick up, I’ve picked up on sale. A great way to find stiff scrapbooking paper on sale is to go at the end of the season and pick up “last season’s” patterns. The page that this book is on, was bought in July for 80% off because it was “last fall’s” scrapbook paper. I find buying in bulk to be cheaper. I have one large stack of paper and some smaller stacks of cardstock. (Note: We also used some colored scraps of computer paper as well. This type of paper would not be great for the entire project, but works well for little booklets.
Glue–I prefer glue sticks for children.
Other scrapbooking supplies are optional for getting started. However, I have to say that now that I have an “educational” excuse for scrapbooking, I will definitely be watching sales more frequently.
Pens and pencils–My daughter created this page by using both markers specifically designed for scrapbooking as well as colored pencils and gel pens. I would suggest that the younger your child is. . .the more towards gel pens and colored pencils you should lean.
“Notions”–This is a sewing term for fancy stuff you stick on your finished product. Ribbon (even paper ribbon), wrapping paper, newspaper, buttons, stickers–you name it, you can be as creative as you want. As my daughter looked at her finished project, she came up with tons of great ideas to spice up her next page.
Artwork–I actually copied pictures from various books, and internet sites to put in our scrapbook. Although it’s difficult to see, my daughter decorated the flap of her notebook with her own sea faring expedition scene. In any case, artwork is a must. You can also include pictures of field trips or other relevant information in your scrapbook. (Think: brochures of places you visit, a sample of an activity or craft–anything your child might want to display.)
Come back soon as we go through the process step by step and talk about the extent of parent involvement required.
Valorie Delp shares recipes and kitchen tips in the food blog, solves breastfeeding problems, shares parenting tips, and current research in the baby blog, and insight, resources and ideas as a regular guest blogger in the homeschooling blog. To read more articles by Valorie Delp, click here.

