We’ve been walking through creating digital slideshows using Microsoft Photo Story 3. Today, we’ll discuss adding titles to your pictures, using picture effects, and recording your own personal narration. You can find the first blog in this series here.
Adding titles to pictures
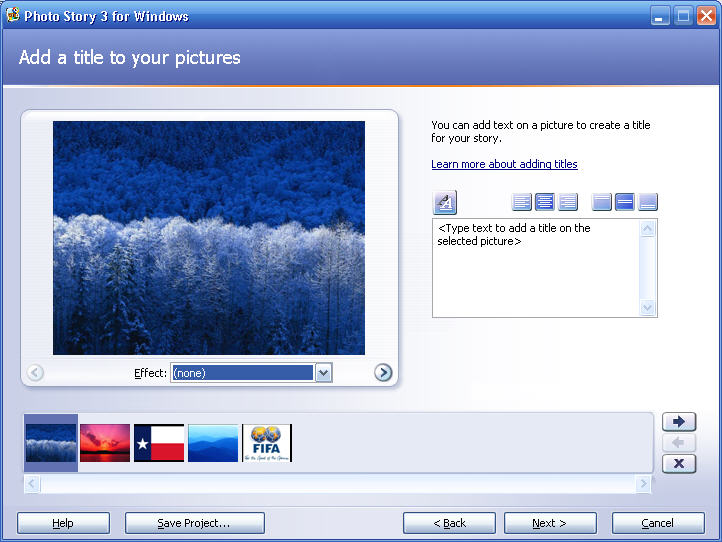
Adding titles to pictures can be helpful for viewers and is easy to do for you. Use the text box next to each picture to type a title (see screenshot below). You can select different fonts or change the position of the title. I usually only use titles to either indicate where or when the picture was taken or if the topic of the slideshow changes (e.g., going from pictures of vacation to pictures of a birthday party).

Adding picture effects
The same screen that allows you to add titles also allows you to add a few picture effects (see above). The effects change the look of the picture and can be useful for title or transition slides. Some of the available effects are black and white, chalk and charcoal, colored pencil, water color, and washout.
Narration
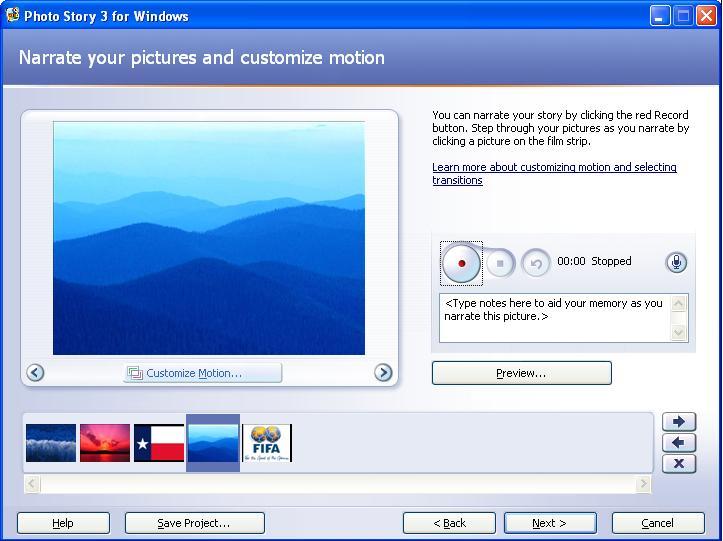
You can narrate your slideshow to give a little added personal touch. In order to narrate directly into Photo Story 3, you’ll need to have a microphone plugged into your computer. For this purpose, any inexpensive computer microphone will do. As seen in the screenshot below, all you need to do is click on the record button and begin talking into the microphone. You will have to manually click on each picture in the slideshow as you are recording or your narration will only play with the picture you recorded it with. You can preview your narration as it would sound in the final slideshow by using the “preview” button.
You can now move on to transitions and motion effects, which are really what set a digital slideshow apart from the old slide projector style slideshows of yesteryear.


