
Recently I shared that we were scrapbooking our way through history in lieu of doing lapbooks. I tried lapbooks but honestly, it just didn’t work for me. (That’s not to say I wouldn’t give it another try as I feel like my kids learned a ton!) I have already posted about materials you need and I promised to give step by step directions. . .so here they are!
Step 1 Gather Your Learning Materials
Decide what you’re studying and what you think is important. This is a “response” project meaning that you do it at the end of the unit or course of study. Since we plan on doing a whole year’s worth of history, we simply take breaks every once in awhile to do something like this.
Step 2 Decide on What’s Important
As you’re going through the material with your child, decide on what’s really important knowledge to have and what isn’t. A word of caution here: if you decide that everything’s important–you’ve missed the point. It is unrealistic and unnecessary for your child to retain everything you’ve ever said on a given topic. A general overview with a good idea of the time period as well as a good knowledge of key people should be the goal. With that said, don’t be surprised if your child walks away with far more.
Step 3 Collect Some Clip Art
I mentioned that we actually just copied things from the internet and used that. In fact, the clip art I collected served as a base for what she included in the book. You can use copies of the books you read, brochures or pieces of them from field trips you took–it’s really an opportunity to get creative. Again, the goal isn’t to include every single piece of information but in fact only the major pieces and other things your child finds interesting.
Step 4 Cut out the clip art and consider lay out
My daughter cut out the clip art but I definitely helped her lay out the project and gave her some ideas of what to include. Essentially, she glued the pieces to scrapbook paper and wrote a short sentence or two describing the picture.
That’s essentially it! Come back later and I will answer some questions and include important notes about improvements, parental involvement, etc. I leave you know with a few photos of our finished Viking page:
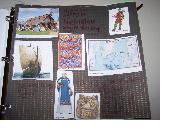 Here is the page fully laid out.
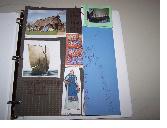 This page is folded because the actually scrapbooking page was larger than the binder. So we folded it and my daughter included some words in “Runes”. It was a great spot to “stick” just one extra thing!